In an era where creating and sharing music has never been more accessible, the allure of having your own home recording studio is undeniable. Gone are the days when professional recording was confined to expensive studios. Now, with a bit of knowledge and creativity, anyone can set up a functional recording studio right in their home, even on a tight budget.
This blog post is dedicated to the aspiring musicians, podcasters, and producers who dream of crafting their art from the comfort of their homes without breaking the bank. We will guide you through the essentials of building a budget-friendly home recording studio, covering everything from selecting the right equipment to setting up your space for optimal sound quality.
Whether you’re a budding artist looking to record your first track, a podcaster ready to take your show to the next level, or a music enthusiast curious about the world of production, this post will provide you with practical tips and valuable insights. We’ll show you that with a little ingenuity and the right guidance, you can transform a modest budget into a studio space that exceeds your expectations. Let’s embark on this exciting journey to build your dream home recording studio, step by step.
Understanding the Basics of a Home Recording Studio
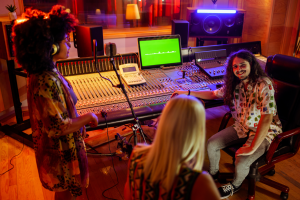
Before diving into the specifics of building a home studio, it’s essential to grasp the basics. A home recording studio, at its core, is a dedicated space where you can record, edit, and produce audio tracks. This setup typically includes equipment like microphones, audio interfaces, monitors, headphones, and a computer with recording software.
The first step is selecting the right room. Ideally, this should be a quiet space with minimal external noise interference and a room shape that supports good acoustics. Basements, spare bedrooms, or even a large closet can serve as suitable spaces. The goal is to find a room where you can control the sound environment as much as possible.
Acoustics play a crucial role in a home studio. It’s not just about the gear you have; it’s about how sound behaves in your space. Hard surfaces create reflections and can cause echoes or reverb that may be undesirable in recordings. Understanding the basics of sound treatment, like using foam panels or bass traps, can greatly improve the quality of your recordings.
The foundations of a home recording studio lie in selecting an appropriate space and understanding the basic elements of sound and acoustics. This knowledge is crucial for setting up a studio that allows for high-quality audio production, even on a limited budget.
Budgeting and Planning
Establishing a realistic budget is the cornerstone of building a home recording studio without financial strain. It’s essential to recognize that you don’t need to purchase everything at once. Prioritizing your purchases based on necessity and gradually building your studio can be a more financially sustainable approach.
Start by determining how much you can comfortably spend. Allocate a portion of your budget to the essentials — a good quality microphone, an audio interface, and headphones or studio monitors. These are the backbone of your studio, and investing in decent quality here will significantly enhance your recording experience.
Next, consider what you already own that can be repurposed. For instance, a reasonably powerful computer or laptop you already have can initially serve as your digital workstation. Software can be a significant expense, but there are numerous affordable or even free Digital Audio Workstation (DAW) options available for beginners.
Be resourceful with where you source your equipment. Second-hand markets, online auctions, and sales are excellent places to find quality gear at reduced prices. Be cautious and do your research to ensure you’re getting a good deal on reliable equipment.
Building a home studio is a journey, not a race. By budgeting wisely and planning your purchases, you can create a space that meets your needs without overspending. The next section will delve into the essential equipment you’ll need to get started and how to make savvy choices within your budget.
Essential Equipment on a Budget
When equipping your home recording studio, focusing on the essentials is key, especially when working with a limited budget. Here’s a guide to the basic equipment you’ll need, along with tips for finding budget-friendly options.
Microphone: A good quality microphone is vital for clear audio recording. Condenser microphones are a popular choice for studio recording due to their sensitivity and wide frequency response. However, if your room isn’t acoustically treated, a dynamic microphone, known for its durability and less sensitivity to ambient noise, might be a better choice. Look for affordable models that are well-reviewed within the audio community.
Audio Interface: This device connects your microphone and other audio equipment to your computer. It converts analog signals into digital audio and vice versa. You don’t need a large, multi-input interface for a basic home studio; a simple two-channel interface will often suffice.
Headphones or Studio Monitors: Accurate sound reproduction is crucial for mixing and editing. For beginners, a pair of good quality headphones can be more cost-effective than studio monitors. They’re also ideal for small or untreated rooms where monitors might not perform at their best due to room acoustics.
Cables and Stands: Don’t forget about the necessary accessories like microphone cables and stands. While it’s tempting to go for the cheapest options, investing in slightly higher quality cables and durable stands can save money in the long run due to better longevity.
Pop Filter: This is an inexpensive but essential piece of equipment for recording vocals. It helps to reduce or eliminate popping sounds caused by the fast-moving air on the microphone during certain speech and singing sounds.
Finding second-hand gear can be a great way to save money. Websites like eBay, Craigslist, or local music shops often have used equipment in good condition at a fraction of the cost of new items. Just ensure to test the equipment or check the return policy before finalizing the purchase.
With these essentials, you’ll be well on your way to setting up a functional home recording studio. The next section will guide you through setting up your room and treating it acoustically to optimize your recording quality.
Room Setup and Acoustic Treatment
Choosing the right room and setting it up for optimal acoustics are crucial steps in creating your home recording studio. Even the best equipment won’t perform well in a poorly treated space.
First, select a room that is as isolated as possible from external noises and interruptions. This could be a spare bedroom, a basement, or even a large closet. The goal is to minimize the intrusion of outside sounds like traffic, appliances, and people.
Once you’ve chosen your space, focus on its acoustic treatment. Good acoustics are not about making the room sound good; it’s about making the room sound neutral. This involves controlling sound reflections and reverberations. Hard surfaces in your room reflect sound, which can cause echo and reverb, affecting the quality of your recordings.
To treat your room acoustically:
Use Absorption Panels: These reduce reflections and can be placed on walls and ceilings. You don’t need to cover every surface; focus on key reflection points.
Consider Bass Traps: These are placed in room corners to absorb low-frequency sounds that tend to build up in these areas.
DIY Solutions: If you’re on a tight budget, everyday items like heavy curtains, rugs, and bookshelves filled with books can serve as effective, makeshift sound absorbers.
Additionally, the placement of your equipment, particularly microphones and monitors (if you’re using them), is important. Keep your microphone away from walls to avoid picking up reflected sound. If using monitors, position them to form an equilateral triangle with your listening position for the best stereo imaging.
By thoughtfully setting up your room and implementing basic acoustic treatment, you can significantly improve the quality of your recordings, making your home studio more effective and professional. The next section will delve into the world of recording software and Digital Audio Workstations, guiding you through the choices that fit your budget and needs.
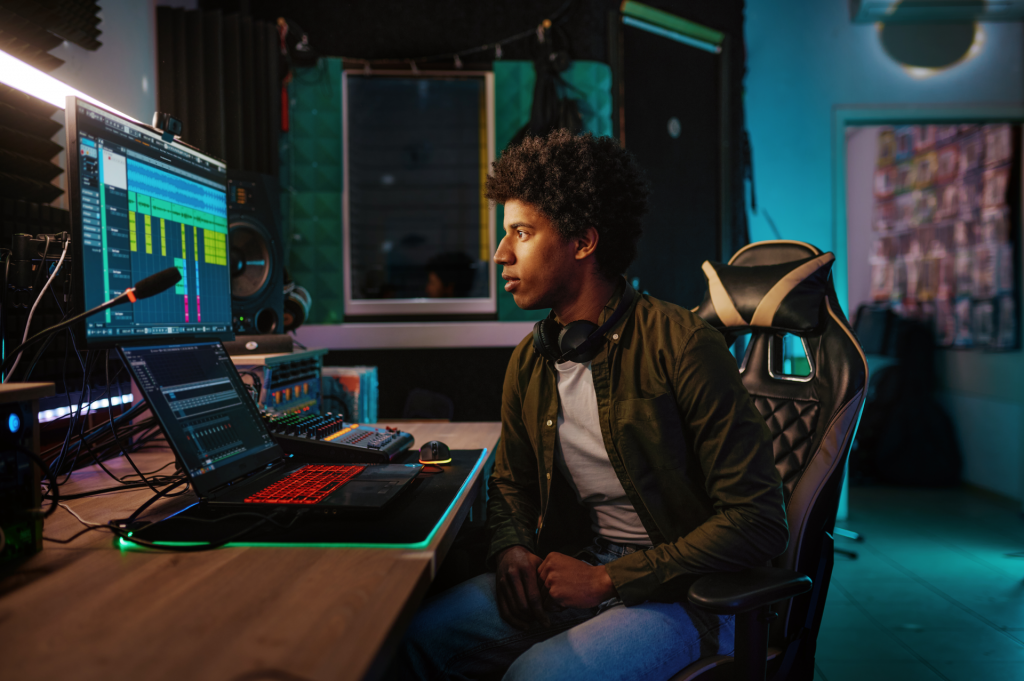
Software and Digital Audio Workstations (DAWs)
An essential component of any home recording studio is the Digital Audio Workstation (DAW), the software used for recording, editing, and producing audio. The choice of DAW can greatly influence your workflow and the quality of your productions. Thankfully, there are many affordable and even free options available that are perfect for beginners and those on a tight budget.
When selecting a DAW, consider the following:
Ease of Use: As a beginner, you want software that is intuitive and easy to navigate. Some DAWs are more user-friendly than others, offering clear interfaces and helpful tutorials.
Compatibility: Ensure the DAW is compatible with your operating system and other hardware components of your studio.
Features: While basic features will suffice for starters, look for software that offers a range of tools and effects to grow with your skills.
For those on a budget, there are several free DAWs that are surprisingly powerful. Audacity, for example, is a popular free, open-source software that covers the basics of recording and editing. GarageBand, available for free on Mac, is another user-friendly option that offers a range of virtual instruments and effects.
For a more advanced setup, investing in a paid DAW might be worth considering. Many of these offer free trials, so you can test them out before making a purchase. Popular choices include FL Studio, Ableton Live, and Pro Tools, each with its unique set of features catering to different aspects of music production.
Your DAW is the heart of your home studio, so take the time to research and choose one that fits your needs and budget. With the right software, you can take your music production to the next level. In the next section, we will dive into some basic recording techniques to help you get the most out of your new home studio setup.
Recording Tips and Tricks
After setting up your budget-friendly home recording studio, the next step is to dive into the actual recording process. Here, we’ll cover some essential tips and tricks to ensure you get the best quality recordings without breaking the bank.
1. Optimize Your Room Acoustics:
Positioning is Key: Find the sweet spot in your room where your microphone picks up the best sound. This is often away from walls to reduce reflections.
DIY Sound Absorption: Utilize affordable materials like thick blankets or foam panels to dampen sound reflections and improve acoustics.
2. Microphone Techniques:
Mic Placement: Experiment with different distances and angles relative to your sound source. This can dramatically change the quality and character of your recording.
Use Pop Filters: A simple pop filter can prevent plosive sounds from distorting your vocal recordings.
3. Gain Staging:
Set Levels Properly: Ensure your input levels are not too high to avoid clipping, but high enough to capture a clear signal. Aim for peaks around -6dB to -3dB.
4. Managing Background Noise:
Quiet Environment: Record during quieter times of day and turn off any noisy appliances or electronics.
Isolate the Mic: If possible, use a microphone isolation shield to further reduce unwanted noise.
5. Use a Click Track or Metronome: Keeping time is crucial, especially if you plan to layer multiple tracks. A metronome can help maintain a consistent tempo.
6. Record Multiple Takes: Don’t settle for the first take. Record multiple takes and choose the best parts from each. This gives you options during the mixing phase.
7. Headphones vs. Monitors: When recording, especially vocals, use closed-back headphones to prevent the backing track from bleeding into the microphone. Save the monitors for mixing.
8. Experiment with Instruments and Vocals: Don’t be afraid to experiment with different sounds, instruments, and vocal techniques. Sometimes the most unique sounds come from unconventional methods.
9. Maintain Your Equipment: Regularly clean and check your equipment. Proper maintenance can significantly prolong the life and quality of your gear.
10. Stay Organized: Label your tracks clearly and keep your sessions organized. This will save you a lot of time and frustration when you start mixing.
Recording in a home studio can be a rewarding experience. With these tips and tricks, you can achieve professional-sounding results even on a limited budget. Remember, the key is to experiment and find what works best for your unique setup and style. Next, we will delve into the world of mixing and mastering on a budget, helping you polish those raw recordings into finished tracks.
Mixing and Mastering on a Budget
The final steps in creating a professional-sounding track are mixing and mastering. Even on a budget, these stages can be executed effectively with the right approach and tools.
1. Understand the Basics: Balance and Panning: Start by balancing the levels of each track. Adjust the volume so each element is heard clearly. Use panning to position sounds within the stereo field, creating a more dynamic mix.
2. Utilize Free or Affordable Plugins: There are many high-quality, free, or low-cost plugins available for EQ, compression, reverb, and more. These tools can greatly enhance your mix without costing a fortune.
3. Equalization (EQ): EQ is crucial for removing unwanted frequencies and enhancing desired ones. Be mindful not to over-EQ; sometimes, less is more.
4. Compression: Use compression to even out dynamic ranges in your tracks. This ensures that all elements are consistent in volume and presence.
5. Reverb and Effects: Reverb adds space and depth. Be careful not to overuse it, as it can muddy the mix. Experiment with different effects to add character and uniqueness.
6. Reference Tracks: Compare your mix to professional tracks in a similar genre. This helps in understanding industry standards and how your mix stacks up.
7. Take Breaks and Revisit: Regular breaks prevent ear fatigue. Revisiting the mix with fresh ears can reveal aspects that need tweaking.
8. Mastering: In mastering, the goal is to ensure your track sounds good on all playback systems. Apply subtle EQ, compression, and limiters to enhance the overall sound and ensure optimal loudness.
9. Monitor Levels and Export: Keep an eye on your master levels to avoid clipping. Export your final track in the appropriate format for your distribution channels.
Mixing and mastering are skills that improve with practice and patience. Don’t be discouraged if your first attempts aren’t perfect. With each project, your ear and techniques will develop, allowing you to achieve increasingly polished and professional results.
Expanding Your Studio Over Time
As your skills and needs grow, so too will your home recording studio. Expanding your studio over time allows you to gradually incorporate more advanced equipment and techniques without overwhelming your budget.
1. Prioritize Upgrades Based on Needs: Assess which aspects of your current setup limit your production quality. It could be microphones, monitors, acoustic treatment, or additional instruments.
2. Invest in Quality Over Quantity: When upgrading, opt for fewer high-quality items rather than many lower-quality ones. A single versatile, high-quality microphone, for example, can make a significant difference.
3. Explore Advanced Software and Plugins: As you become more proficient, consider investing in more advanced DAWs or specialized plugins that offer greater functionality and creative options.
4. Enhance Acoustic Treatment: Improving room acoustics can dramatically uplift your recording quality. Consider professional-grade bass traps and diffusers as you expand.
5. Consider Outboard Gear: As your budget allows, explore outboard gear like preamps, compressors, and EQs for a more professional sound.
6. Continuous Learning: Keep learning new techniques and stay updated with industry trends. This knowledge is as valuable as any equipment upgrade.
7. Networking and Collaboration: Expand your network. Collaborating with other artists and producers can provide new perspectives and opportunities for growth.
8. Regular Maintenance: As your studio grows, so does the need for maintenance. Keep your equipment in top condition to ensure longevity and consistent performance.
Upgrading your studio is a journey that parallels your growth as an artist and producer. Each addition should be a step towards refining your sound and expanding your creative possibilities. Remember, a well-thought-out upgrade plan can lead to significant improvements in your production quality without straining your finances.
To Sum It Up
Creating and expanding a DIY home recording studio on a budget is a fulfilling journey that blends creativity, technical skill, and resourcefulness. Throughout this blog post, we’ve explored how to start with the basics, make intelligent equipment choices, and utilize effective recording, mixing, and mastering techniques without overspending.
Key takeaways include the importance of understanding your needs, prioritizing your purchases, and always aiming for the best quality within your budget. Remember, the gear doesn’t make the producer; it’s your skills, creativity, and dedication that truly bring your music to life.
As you grow, your studio will evolve with you. Each new piece of equipment, every software upgrade, and all the knowledge you gain along the way are steps toward mastering your craft. Embrace the learning process, experiment with new techniques, and don’t be afraid to make mistakes. These experiences are invaluable.
Finally, stay connected with the music production community. Sharing ideas, experiences, and collaborating with others can provide fresh insights and inspiration.
Whether you’re recording your first track, mixing your latest project, or planning your next studio upgrade, remember that your journey in music production is unique and ever-evolving. Enjoy every step, keep learning, and keep creating.